Showing posts with label Maya. Show all posts

Monday, 24 January 2011

Pre-Production: Character Rigs (Shahbir)

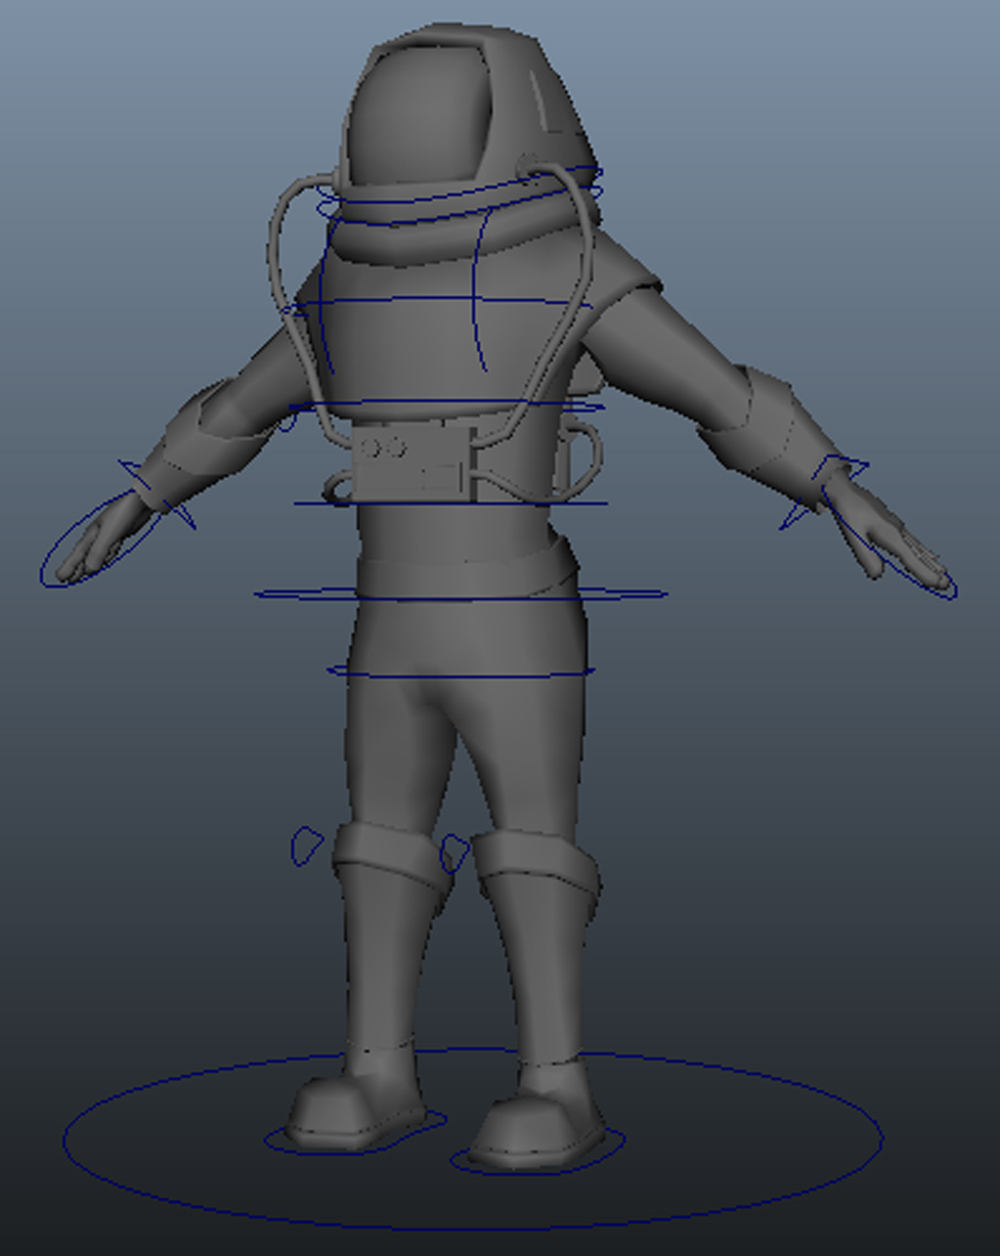
Nearing the deadline in showing our trailer my group decided to give the characters who won't be moving much only arm, spine and head control while the rest will have full body control with IK to FK Switch, the IK's are represented by triangles while the FK's are represented by Squares. All the characters have blend shapes ranging from mouth movements to eyebrow movements.

General


Scientist


Assistant


Astronaut FK Rig


Astronaut IK Rig


Soldier FK Rig


Soldier IK Rig


Generic Male FK Rig


Generic Male IK Rig


Generic Female FK Rig


Generic Female IK Rig

Wednesday, 12 January 2011

Maya: Miniature Park Set Modelling

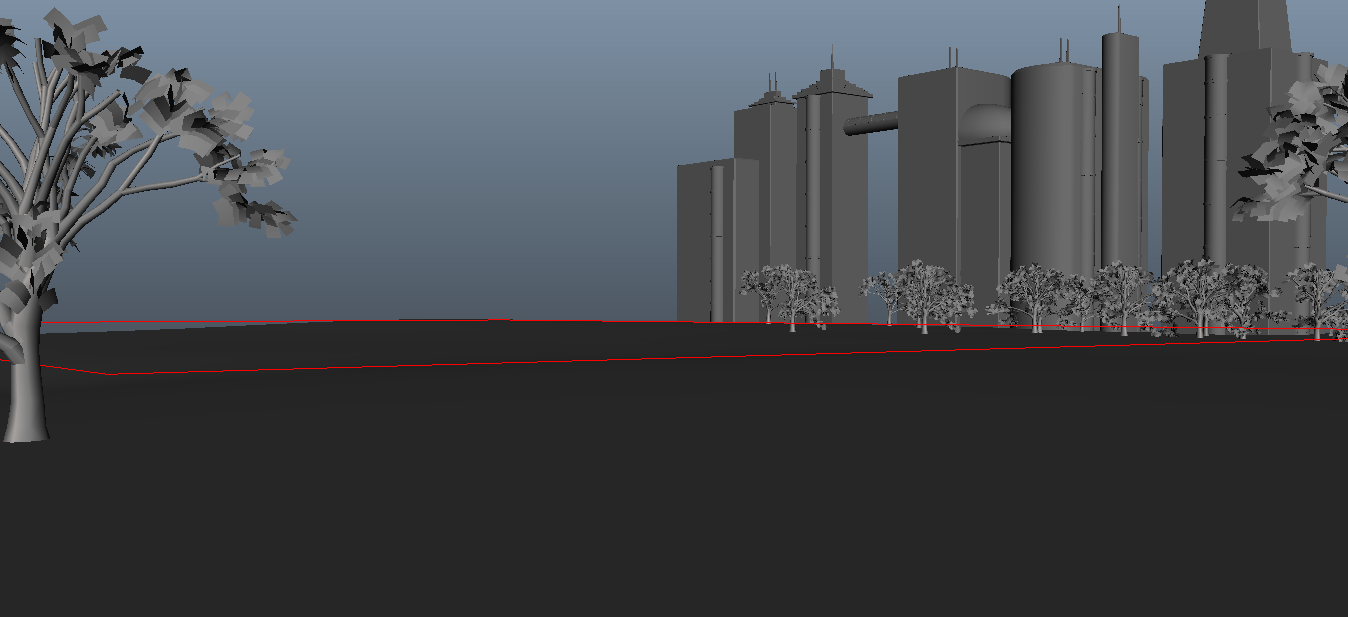
Having the metropolis miniature set done, I moved onto the next and last miniature model the park, once again based on a concept art I have done and story boards done by my colleague Ethan, I was  able to place the cameras and model the set around them. This set also features trees, although not firstly intended, I  have used paint effects customised with my own texture, so the tree is a customised cheap tree. also the models of the buildings are the same of the other set to build consistency in the metropolis design.

**EDIT

After Speaking to Ethan, he pointed that maybe the park should be a more enclosed setting, So I suggested to to bring the trees closer, although not looking exactly the Hyde park, the setting is perfect for our animation,.

Miniature Park Shot 1


 Miniature Park Shot 2


Miniature Park Shot 1


Miniature Park Shot 2


To come next the life-size park with life size trees needs to be assembled, and some quick environments for the pursuit scenes, apart from that set modelling is done and I'm off to texturing at last!

Tuesday, 11 January 2011

Maya: Retro-Futuristic London Modelling

So as promised I present you the the first miniature set modelled and placed, based on my concept art I have done a while back I present you the model of the futuristic London.


Camera- 1st Shot- Establishing Shot


Camera- 2nd Shot


Camera 2nd Shot- Tunnel w/ miniature people


Camera 3rd Shot- Car Turning Mechanism


So here are the 3 camera shots we will show in the trailer, however the animation of the cars is still needed. 

As a note we have also received some new voice over for the animation, in which the group thinks it will better fit the animation, wait and see!!

Now onto the making of the miniature park!

Maya: Various Props Modelling

In our Studio Project, we have been extremely busy the last couple of days, to try to get the this animation out there! While I was concentrated on Set Modelling, my colleagues had other tasks, Ethan in the animation part, working exhaustively to create motion into the characters  and Shahbir getting the facial rigs ready so the characters can speak and have emotions. This is my excuse in which i havent been able to post updates on the blog, however to treat the followers out there I have some pictures of the models I have been doing.

To begin with is the long-awaited soldiers gun, for a few weeks the soldier wasn't able to combat the threat from the Invisible Cannibals, though with a little upgrade provided from me he is not able to face them.


Soldier Gun Model


To add to the model I have also created a control to move the gun around or even being thrown out and on the same control is a trigger attribute which moves the trigger for a shooting animation. With so many controls I have been creating lately, I dont doubt that someday my colleagues will call me a control freak... CONTROLS!!

The next on the list was the the props to add to the park, they will only serve to populate the life-size set of the park which I'm working on. So for this purpose I create some lamp post, some bins and some benches, this model, however didnt come from my head they were all based on designs I researched, and which will serve me as reference for texturing it.


Park Props Models


Park Props Models UV mapped


Lastly, it comes the main reason I have been so entertained with maya lately, I have been creating the miniature metropolis, however before placing the items I created them separately, then I would have a kind of store and could buy whatever I liked to the metropolis set. Being a miniature set it wont receive much detail,  however everything was UV mapped so I can create a hand made texture. 


Metropolis Props Models


Metropolis Props Models


The list for this miniature set is almost endless, I can remember I have done the 9 types of buildings, the huge bridge, the 2 variations of people's bridge, a car turner, I have created some miniature people based on the generic male model, roads, etc. 

And yet to come is the big surprise the final set all assembled together. Do not worry I will delivered while it is hot.

Friday, 7 January 2011

Maya: Laboratory Modelling

On the last couple of days I have been busy modelling the sets for our animation, after getting some done, where my colleague Aflockofpixels started to animate on, I carried on creating the rest. Next on the list was the Lab where the 3 members of the cast will firstly reveal the Invisible Spaceman. So without anymore talking I present you the lab. 

Laboratory Modelled


Firstly is the model of the lab untextured, where I have added the a few props, such as the computer on the desk based on a 1st gaming console, or the tall computer based on the first tape recorders, also I've added a lamp on the top which can be used as a light source, for that purpose I have added a simple control where the lamp rotates if the camera changes.  


This picture shows the set UV mapped and ready for texturing ! :)

As well as the Lab, I have create a small scene in the beginning of the trailer where the space-station commander presses the emergency button, something really simple. Here is the set:


For this set I have created a simple cockpit and then added the button, which has a control to be pressed for animation.
 A  really simple Set to do but crucial for the few seconds it holds in the trailer.


Now onto the outdoor scenes

Monday, 3 January 2011

Maya: Tank Interior Modelling

Today, I have taken a previously modelled set by my Studio colleague Shahbir and added some more details, as well as UV mapping the overall set, ready to be animated. in this scene one of our soldiers will be dragged out of the set by the Invisible Cannibal. I have seen part of the animation that my colleague Aflockofpixels is doing and it looks very promising so await and see!!
For now here is the set finished!

Tank Interior Model


Tank Interior UV Mapped

Maya: Space Station Interior Modelling

After getting the desk ready, so my colleagues can start animate on the set, I commenced to model another environment- the Space-station Interior- based fully on a concept art I have done previously, it prove enjoyable to get back to modelling environment however time consuming when laying out the UVS to apply textures. As you may see the model looks very similar to the concept art, where I have also added the interior of the dorms, or at least the wall you can see.

The Initial Concept Art


Untextured Modelled


 UV mapped


As I mentioned in the beginning of this post this scene can now be animated, but also textured, leaving us only the rendering to do. A backdrop will also be added on the set as the back of the corridor can be seen.

For another scene in the Space-station, i had to create an alarm, which will alert the people in the Space-station. I have added a couple of the models already on the Space-Station Interior, however I created a whole new scene where you can possibly render without all the extra geometry of this scene.


Alarm Model with cap


Alarm Model without cap


Alarm model UV mapped


For this alarm, based on the 1950's police sirens, I have also added a control which will be easier to animate, where the overall inside will rotate in one axis, by merely having an attribute on the mesh group controlling it. 

Now onto the other environments! 

Sunday, 2 January 2011

Maya: The Rest of the Character Pose Sneak Previews

Here are the rest of our characters in a test pose. Doing a test pose like this has proved useful as I've found some of the less noticeable glitches in the rig, that couldn't necessarily be found from only testing it's basic functions with only the skeleton to look at. In some cases I have also noticed a few more little problems with the skinning, but I think they will have to remain there as time is running out.

The Scientist - looking very creepy!


The Generic Female - screaming as per usual


The Soldier - he almost looks ready for battle, except he has no weapons.


The assistant - So shocked at the sight of nothing (in the space suit)


The general - fallen asleep on set


Anyway, these are our team of actors who are going to make 'The Day of the Invisible Cannibals from Beyond the Stars' a masterpiece... or a B movie disaster.

A Flock of Pixels

Friday, 31 December 2010

Maya: Character Pose Sneak Preview

I haven't posted anything in ages!

Well, over the past few weeks I have been skinning characters for the narrative project. It seems like everyday we have to re schedule because we cant keep up with a days work. Anyway, we are now at a stage where we have seven rigs, and I have just merged some of them with the skinned spaceman. I posed him, sitting down taking a rest while adjusting his battery pack thingy.


As soon as all the characters rigs are combined with the skinned files, I will post some videos on everything working.
Ruben is busy with creating the environments while Shahbir will be doing the characters facial rigging (excluding spaceman), while I will begin preparing and organising stuff for animation, and then animating.

Right now I am combining the rigs with the skin on all the characters. This is getting very monotonous, with all the joints that need parenting.
Here's another character.


A Flock of Pixels

Maya: General's Office Modelled


Firstly taking on blocked out General's Office done by my Studio Colleague Shahbir, I added more objects, such as the lamp, the phone, and the chair. With everything modelled I began UV Map it and now the overall set is in a stage where It can get to the animation.

Today, I have also started to model the interior of the Spacestation, which will be uploaded when finished.

Tuesday, 28 December 2010

Maya: General Muscles

Deciding that only the male characters will have muscle, I just had to add to the general, being a character with a certain age, i have added less muscle visibility, and no jiggle.

General Muscles Both Arms  


Maya: Soldier Muscles

After getting all the skinning done for my 4 characters I added some smaller tweaks, such as muscle and jiggles, this was used to create a more convincing model where the animation will look more accurate to of a real person.


Soldier Muscles- Wire


Soldier Muscles- Smooth


Soldier Muscles Both Arms


Thursday, 23 December 2010

Maya: Generic Female Basic Skinning

Here is the Ruben! with an update on the skinning process of our characters, at this stage skinning is pretty much done in my characters and with Ethan's ones, just needs some tweaking by adding muscle, and maybe jiggles.

The generic female was my last character to skin, and maybe the trickiest one because of the skirt and the hair are complex geometries, other than that everything went all right. As far  Rigging goes, I was informed it was a bit off schedule but Shahbir is catching up with it. when these 2 processes are done, Rigging and Skinning we can start animate, the movements of the characters, however facial rigging still needs to be done in order to make dialogues for the trailer.

Skinning: Generic Female Head and Torso


Skinning: Generic Female Hand


Skinning: Generic Female Legs


Monday, 20 December 2010

Maya: Assistant Basic Skinning

Continuing on the Skinning task, the next character to be skinned was the assistant, which happens to be a character I have also modelled. Being the first female character to be skinned it was quite tricky at some points, but nothing some patience wont solve.

Assistant Head Skinning


Assistant Torso Skinning


Assistant Hand Skinning


Also according to Ethan to better pose the character, I have also added a basic binding onto the legs and shoes, just so the character will pose more convincingly even though no rig needs to be done. 


Assistant Legs Skinning (No Rig) 


Saturday, 18 December 2010

Maya: General Basic Skinning

here is Ruben in his Skinning quest! ( doesn't it sound wrong, never mind!)

After getting the soldier up for the final touches of skinning I decided to take on the General and add the basic skinning, bind the skin and tweak the weights. 
Although for this character I bound the overall mesh, only the upper body was tweaked, as he will move and be seen from the pelvis upwards.  

Now the only things to add are the muscles and some jiggle (if needed). 


General- Hand Skinning


General- Torso Skinning


General- Head Skinning


EDIT**

Once again for the purpose to pose the character more convincingly, I skinned the legs of the General

General- Legs Skinning


Now onto the next 2 characters !

Thursday, 16 December 2010

Maya: Soldier Basic Skinning

Firstly, I will have to say that most of the progress from now on will be posted in videos as we begin to step into the realms of animation.

So after getting the models ready for the animation, my task laid in doing the skinning, which is a crucial process to get convincing  animation, by creating muscles on a character or avoid the geometry to collide with itself. 

I can say here is the skinning for the soldier until certain extent where only the arms and legs muscles will be added, to create a rather more convincing motion in the character. Also the last thing to add will be the some jiggle deformers around the sleeves. This process will be carefully monitored when to render as the cache needs to be loaded just before the rendering starts.


Soldier Skinning- Arms & Hands


Soldier Skinning- Legs & Shoes


Soldier Skinning- Head


Sunday, 12 December 2010

Maya: All Seven Characters Fully Modelled, Scaled, UVmapped and All Joints Placed

That was a mouthful!


Just to be clear, they were not all modeled by me. It's been a team effort to get all the characters at the place they are today. I volunteered to finish off the characters UV maps and placing the joints. While Shahbir volunteered to do all the rigging and has been busy testing first on the soldier. I'm sure Shahbir can fill you in on all the details with rigging. In the week ahead Ruben and I will be skinning, while Shahbir does the rigging.

Spaceman


Soldier


General


Generic Female


Generic Male


Assistant


Scientist


So we are all going to be busy next week!

A Flock of Pixels